Wednesday, May 7, 2014

Final additions

The lock has seen a few minor code changes.

Self-owners who timelock themselves will no longer have access to add new owners while they're timelocked. This means that for the self-bondage player who doesn't want to be pestered by random strangers, they can self-own their attachments, and use the timelocks for extended endurance play. Non-timelocked but locked self-owners will have full access to the menus.

The person who last locked your attachments, and the person who last activated your timelock, or modified the time on your timelocks, will be notified when you are released. This applies to owners as well. The lock(s) will support up to 9 owners, but to cut down on spam, and keep the scripts as fast as possible, only the one who locked you, and the one who timelocked you will be notified. Only one IM will be sent if they're the same person.

Most mode-change notifications have been changed from using the private 'llOwnerSay' message command, to now using llWhisper which can be heard by anyone in a 10m radius. This change does make the script more noticeable to others in public areas, but it reduces the number of messages that need to be sent to notify the wearer, menu user triggering the mode change, and any owners, last lockers, and so-on standing in the area. The messages involved are limited, and happen infrequently, but include things like "your hood was unlocked after 5 minutes" or "your timelock was changed, and is now set for 3 hours".

Personally, I prefer that "Silent" behaviour, anything that reduces the amount of object chat spam is a good thing. But in this case, I think it's reasonably desirable to have it say "Your shoes were locked on" when they get locked. It appeals to that little part of me that's an exhibitionist, and in this case, it's just the easiest way to notify the wearer and the menu user that the intended function executed.. and if it feeds a little blush-factor for the sub at the same time, then all the better.

The only function I am considering adding at this point, is a small command to automatically load plugin menu buttons. While they're easy to add manually, a part of me REALLY would like that function to be automatic, which would allow end-users to mix and match plugins without requiring me to custom modify the lock scripts for them.

The following code should do the trick, assuming a plugin script was named "plugin-Gag", it should automatically add a button named "Gag". Though it's questionable whether it's the most memory efficient way to format the code.

integer i;
for (i  = 0; i < llGetInventoryNumber(INVENTORY_SCRIPT); i++)
{
     string scriptName = llGetInventoryName(INVENTORY_SCRIPT, i);
     if (llSubStringIndex(scriptName, "plugin-") != -1) buttons += llDeleteSubString(scriptName, 0, llSubStringIndex(scriptName, "-"));
}

Sunday, May 4, 2014

The Lock

In a recent post, I talked a bit about the story behind the project I've been working on, but I want to explain what it is that I feel this script is going to make possible.


Primarily, this lock script will allow me to create more 'Fetish' type items. Items similar to the Fetish Doll Hood, the Latex Implants, and so on. I've had a number of ideas for cool new products, and plenty of customer suggestions too. Ways to improve on existing designs, or ideas to make entirely new items. Some made entirely by my hand, others might be made as collaborations or even using some prefabricated elements. A prime example being the Plateau Ankle Boots.

While I don't have plans to go 100% into using prefabricated meshes (I love building things too much) I can certainly see the value in making some inexpensive texture-changing items that make use of some prefab mesh parts, in conjunction with my textures, hud, and other scripted functions.

Being able to add the lock script to such a product would make it better... and honestly I would have loved to have added some locks to the straps on those Plateau boots. =)

Another thing it will enable, is the continued updating of older ER items, to keep up with the times. The example of the Fetish Doll Hood comes up again here.. if I were to add more catsuits in different colors, it would only be a matter of minutes before the requests came in for an updated version of the Hood with textures to match.

I've thought long and hard about how-best to deploy an update like that.. and honestly I haven't decided. If I pair that functionality change with an updated mesh model, and a whole new slew of textures, it might just be easier to retire the old one and sell the new one for a similar price.

That issue aside,what this script is really about, is about enabling a useful and interesting level of scripted RLV type functionality, and creating a consistent level of 'good' functionality across all products that need that functionality.

I think I've come up with a good mixture of settings and menu-access rules that will create a fairly intuitive, and sometimes challenging experience that will make ER's lockable items 'fun', regardless of your particular needs.

And having the locking script be a single, modular script, means that ER products will support modding even more than before... allowing end-users to remove or replace the locking functions entirely, while still keeping the texture change and appearance controls that make ER products so desirable.

But above all, what this locking script is going to do, is make it easier for me to make new products. New products that work reliably, consistently, and well. The same way that the Appearance Hud has allowed me to focus more on the 'designing, building, and texturing' parts of making new things, this locking script will allow me that same freedom with lockable items as well..

Allowing me to spend less time planning menus, puzzling over algebraic equations, writing and debugging scripts, and testing.

The Lock won't free me from that entirely.. I'll still need to script the occasional plugin, and of course not everything I make needs to lock. But having this script that I can re-use again and again will mean I need to do less of that, and when script bugs are found and fixed, it will make it easier to apply that fix to all the lockable items that use that script.

In just about every measurable way, this script will help me do more of the things I love, more often, and to hopefully spend less time doing the things that I dread, the things that hold me back, and have kept items piled up half-finished for ages.

Saturday, May 3, 2014

The Lock - access modes

The following is really more of a "thinking out loud' than an actual blog post. I need to get some of this stuff into words that will eventually become the user manual.

  • No Owners (Public Slave)
    The Wearer
    When unlocked, the wearer has access to:
    lock, timelock, add/rem time, start timer, owners, add owners

    When locked, the wearer has access to no functions. Period.

    The Stranger
    When unlocked, the stranger has access to:
    lock, timelock, add/rem time, start timer

    When locked, the stranger has access to:
    unlock, timelock, add/rem time, start/clear timer
    Description: If you have no owners, you're at the mercy of your friends and anyone else. This is similar to walking around with your keys in your locks. Anyone can grab them, and lock you up. You can even choose to lock yourself up, but you'll be helpless to get out on your own. If you didn't use the timelock, you'll need to ask someone to let you out, and hope that they will.
  • 1-9 Owners (Owned Slave)
    The Wearer
    When unlocked, the wearer has access to:
    lock, timelock, add/rem time, start timer, owners, add/rem/list owners

    When locked, the wearer has access to no functions. Period.
    The Owner(s)
    When unlocked, the owner has access to:
    lock, timelock, add/rem time, start timer, owners, add/rem/list owners

    When locked, the owner has access to:
    unlock, timelock, add/rem time, start/clear timer, owners, add/rem/list owners

    The Stranger
    When unlocked, the stranger has access to no functions.
    When locked, the stranger has access to no functions.

    Description: If you have owners, then you're in their care completely. Strangers can't access your locks whether you're locked, or unlocked. In that sense, you're 'safe'. However, if your Owner(s) left your attachments unlocked, and you decided to play with them, and lock them on yourself.. only one of your owners can unlock you. AND.. while you're locked, you can't add or remove your owners. if you set a timelock for yourself, the attachment will unlock itself again when the time runs out.. but beware, your owner can always choose to add more time. Owners can also add or remove owners from your attachments, without your consent... though you regain the power to add/remove owners once your attachments are unlocked.
  • Self-Owned (Day Slave / Self Bondage)
    The Wearer-Owner
    When unlocked, the wearer-owner has access to:
    lock, timelock, add/rem time, start timer, owners, add/rem/list owners

    When locked, the wearer-owner has access to:
    unlock, timelock, add/rem time, start timer, owners, add/rem/list owners

    When timelocked, the wearer-owner has access to no functions. Period.
    The Other Owner(s) - if any
    When unlocked, the owner has access to:
    lock, timelock, add/rem time, start timer, owners, add/rem/list owners

    When locked, the owner has access to:
    unlock, timelock, add/rem time, start/clear timer, owners, add/rem/list owners

    The Stranger
    When unlocked, the stranger has access to no functions.
    When locked, the stranger has access to no functions.

    Description: This mode enables a strong level of caution and control for the wearer. If you're unsure about the trustworthiness of your playpartners, adding yourself as an owner can allow you an 'easy out' from the locks, if the scene should become too much, or if the other person locks you up, and doesn't return. The downside of this mode, of course, is that it's not very strict. If locked, you can simply press "unlock" to get out. and whether locked or timelocked, you can always add or remove owners.

    The one exception to this 'easy out' is the timelock.
    If you're a solitary player looking for self-bondage with timers that no one can lock you into without your consent, and no one can get you out of, then this mode is for you. If your attachments are 'self-owned' and you don't have any other owners, then NO ONE can get you out of a timelock once it's activated.. except for waiting for the time to expire.

Friday, May 2, 2014

The Black Box - Reloaded

In summer of 2012 I hit a wall.

I'd been working on some new latex items that included a pair of really neat shoes. I figured I'd make them lock on, and have a little bit of color change so they matched my latex catsuits.

A few days earlier, a customer had contacted me, asking me if I could make some custom textures so their hood could match this third party catsuit that they loved. I did my best, it turned out ok.. but the way the hood was scripted, I had to remove one of the 12 built-in colors to put in their new custom color. That day, I looked at my catsuit colors and realised I didn't like some of them.

That's a hard thing to accept: that some of your work isn't as good as you'd like it to be. I held this new color in my hands, thinking how nice it would be to release it. But I couldn't make a catsuit that color, if it didn't match the colors available in the hood, implants, hairs, and so on.

The shoes I was working on.. I knew would have an issue. Even if I added 'just latex' textures to the foot part, I knew it was only reasonable for people to want to be able to match the foot part to their skins too. I'd need more than 12 latex textures there, and I'd need a tinting-tool as well.

This is of course the moment that I realized things needed to change.

I looked at my store in Healy.. constantly rubbing against the land's prim limits. I looked at how much space I was wasting in the store with ramps and walkways, and how many prims I was wasting too.

I created a whole new store made of mesh, at a time when only half the viewers could see mesh. I rebuilt my vendors to use mesh as well, allowing me to sell more products while using fewer prims, especially for things that "came in colors" like catsuits.

I planned to outsource the appearance controls. Thinking I was going to just buy an "off the shelf" texture/color changing HUD kit, I started working on a grand project to completely redesign my RLV/locking functionality in my products.

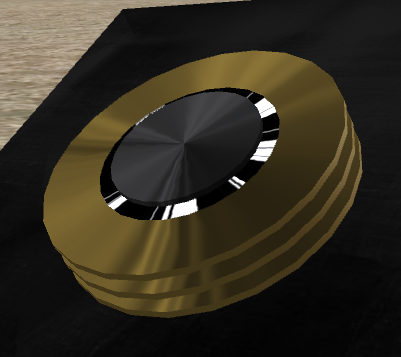
Memory Discs on the Black Box
Unfortunately, after weeks of work on "The Black Box" (as I called the locking script), I came to the realization that I needed to know how the appearance control system was going to work, before I could finish the lock

I checked into the appearance control HUD system that I had planned to buy, and asked the maker a few questions. Unfortunately, it seemed that my particular needs weren't going to be well served by his product (things like moving a piercing, if the piercing was enabled, while also changing an arousal state). To his credit, the maker of that product advised and encouraged me to make my own appearance control HUD system.


And I did. You've seen that HUD deployed in the ER Plateau Ankle Boots, and in the Jouet Doll and in the Ares Penis. It's a good system.. a touch slower than I'd like, but for what it's actually doing behind the scenes, it's honestly lightning fast.

But the 'tokens' that it uses.. the little codes in the prim descriptions that look like "eyes.c[1, 2]&lashes.a=4" aren't compatible with  the lock show/hide code in the Black Box scripts that I wrote.

I'd had this dream of a system that worked like Lego Bricks. Each product would have a locking script, and possibly one or more 'module' scripts that would add additional RLV functions. If I wanted to make a blindfold.. drop in the main locking script, and the blindfold plugin. Want to make a gag? Put in a lock, and the gag plugin. And if customers wanted something like the Fetish Doll Hood to act like a blindfold and gag? All they'd have to do is copy the gag and blindfold plugins into the Hood, and the lock script would automatically detect the plugins and know how to use them.

I spent a LOT of time on the Black Box, and it really wore me down emotionally at the time. The little tile-spinning escape puzzle was fun, but it never had it's 'unlock' button properly implemented. In fact, the whole thing had taken weeks to develop, and was still only about half finished. And it had used so much memory that I'd had to split it into two scripts.. and I was staring down the prospect of needing 3 or 4 by the time the whole plugin system was working.

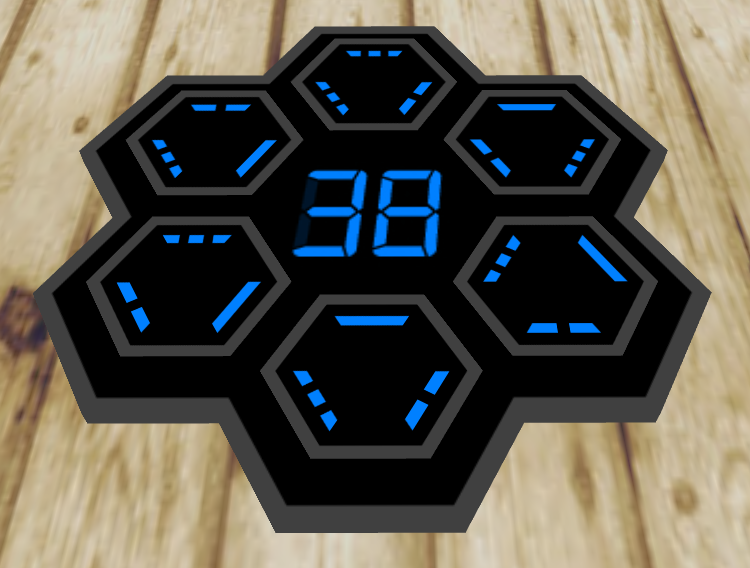
The Black Box's Unlock Puzzle
And now I'd have to pretty much redo the whole thing to get it to work with the appearance HUD I'd built.

The project languished. I gave up on it. I spent my time trying to focus on making products that could use my HUD system, without needing locks... but I knew the time would come when I'd need to come up with something.

Over the past few months, I've started thinking about the Black Box.. and about 'feature creep' in general. I started accepting that maybe the grand scope of the black box project was.. beyond me.

Maybe not in terms of intelligence. I could do it.. I could work out all the functions and commands and code I'd need to make that script happen exactly the way I wanted it to. But in terms of patience, persistence.. those have to factor in to any calculation of 'ability' too. How long, honestly, can I sit and stare at code, day after day, week after week.. how many scripts, how much memory?

Is it really worth holding off fun projects like those cool shoes, for YEARS.. just to get the perfect lock?

No.

The Black Box is in my way.. it's too big, and it would require too much of me, of my time, my energy, and it's holding up the fun shiny stuff!

So, over the last few days, I've been working on a stripped down version of the Black Box project. That whole modular system? Gone.. sorry. The escape tool? As fun as it was.. I'm ditching it as well.

It's hard to illustrate a script in an interesting way. Here's a lock prim instead.

 What I've come up with is a simple, solid locking script that has a timelock. It allows self-locking, and self-owning. There's an owner's list too for up to nine owners, and the entire 'keys' concept is gone. The end result, I hope, is a bit stricter of a script.. with interesting ways to use the lock.


Own yourself, and you can undo the locks, but not the timelock. Don't own youself, and you're helpless when locked, but anyone can lock, or unlock you. Add owners, and you, or someone else can lock you into something, but only your owners can get you out.

No escape buttons. No lockpick tools.

Your only escape option is to log out into a non-RLV viewer, and reset the scripts... and you'll blank your owners list at the same time.. which means you'll have to go crawling back to them to re-add them. Of course there will be IM notices sent to your owners if you do remove your locked attachments in a non-RLV viewer.

It's a simple lock in some respects, but it's also more robust than the locks ER has had in the past, and a bit stricter too. the 9-owners should allow for more flexible play as well, and I know a lot of people will be happy that I've removed the 'too easy to push' escape button.

As of right now, the basic structure of the lock script is finished. What remains to be done at this point, is adding the commands that will tell the appearance controller to hide or show any lock prims, and writing the 'slave' script that lives in the 'left shoe' of paired/multi-part items. I feel fairly confident that these parts will be finished in a day or so.

And then I'll spend a week or so testing the system, trying to find any glitches or bugs.

When will you see it in a product? Well that's a harder question to answer. Most of the products I was developing before all this started are made with sculpts. Converting them to mesh is a small matter, but it's still a step that needs to happen. But as part of that process, I'll want to re-visit the design stage again and make them as nice as possible. Plus it's important to remember that none of those items was fully 'finished'. Likewise, updating older products will take some time as well.

But having a usable lock script will mean that I CAN make and release products that need to lock.. and it will mean that I can update older items too, without losing their ability to lock in the process.

Today, my focus is going to be on finishing out the bits that the lock script needs. We'll see what comes next once the locking script passes it's testing phase.

Blog import issues

I've imported most of my old posts from my Wordpress blog over to here. There appear to be some issues with large images not fitting properly.

I'll try and go through and find the biggest offenders, and fix them up soon.

For now, we're moving forward from here.

Wednesday, February 5, 2014

For a friend: How to add a border to images, using irfanview.

Adding a border to an image is a very easy process, and while it may seem daunting at first, it's really very simple. There's a great free tool available for Windows called irfanview, and it's very good and opening image files, and allowing very basic editing, like cropping (cutting an image down), or resizing an image, or saving it as a different file format.

For these instructions, you're first going to want to download irfanview, which you can do by clicking this link: http://www.majorgeeks.com/mg/getmirror/irfanview,1.html

Once you load that page, the file should begin to download. Once saved to your computer, run the installer, and then run the irfanview program.

The following steps will help walk you through adding a 1 pixel, grey border around your images.

  1. open the image.

  2. select Image > Change Canvas Size..

  3. Set the four "Method 1" side numbers to -1. -1 left, -1 right, -1 top, -1 bottom.

  4. make sure that "if negative values are used: add canvas to inside" IS CHECKED.

  5. Click the "Choose" button

  6. enter "205 205 205" in the Red, Green, and Blue slots on the bottom right of the color picker (ignore the other slots, they'll change as you add your numbers in.

  7. Click "add to custom colors" and Irfanview will remember this color in one of the 16 squares on the lower left.. next time you do this, you can just click the saved color.

  8. now click "OK"

  9. now click "OK" again.

  10. now use File > Save or File > Save As.. to save the new version of the image with the border.

Thursday, November 21, 2013

Just playing with shadows, and scale.

[caption width="3360" align="aligncenter"] Playing with shadows and scale[/caption]

I have to admit.. I wish my video card was beefy enough to run SL like this all the time.